5 Easy And Fun Animal Crafts For Kids
To keep kids away from digital screens, it’s best to offer them something that they can enjoy for a long time. Think, for example, of making easy and fun animal crafts.
Whether at home or at school, this activity offers small children the space to expand their knowledge, improve their motor skills, learn new techniques and share the experience with their family or classmates. The benefits are endless!
Five easy and fun animal crafts
Here’s a list of five animal crafts that are really easy to make with materials you probably already have around the house.
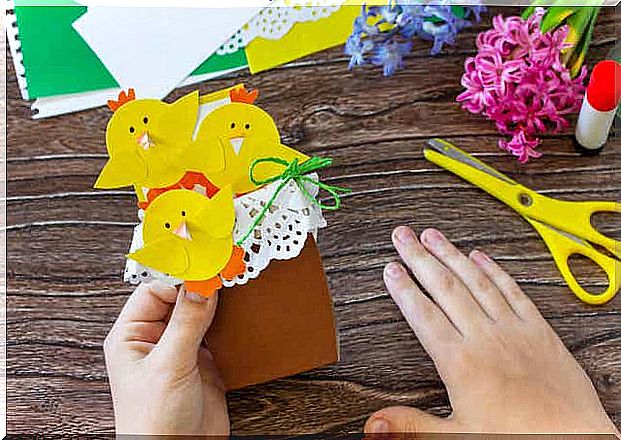
1.Chick Stamp
Materials:
- Cork
- yellow paint
- brush
- Highlighter
- Orange cardboard
- White Cardboard
Step-by-step:
- First, paint one end of the cork with yellow paint.
- Press it as a stamp on the cardboard so that you get a yellow circle. Repeat several times.
- Then you add a few yellow painted wings to the sides of each and let them dry.
- In the meantime, cut out small triangles from the orange cardboard and fold them in the middle. These are the beaks of the chicks.
- Finally, when the paint is dry, draw the legs and eyes with the marker and glue the beak.
And that’s it, you have your chick stamp painting to hang on the wall!
2.A snake made of colorful beads
You need this:
- Different colored beads with big holes
- Chenille wire / pipe cleaners
- A pair of moving eyes
- A piece of pink or orange ribbon
- silicone glue
Step-by-step:
- First, coil up one end of the chenille wire, which will be the head of the hose.
- Then thread the beads on the other side, leaving two centimeters at the end.
- Then fold the end over and close by twisting the chenille thread. Shape it into an “S” shape.
- Cut a piece of the ribbon and cut a V-cut. This is the tongue.
- Then glue the moving eyes and tongue on the head.
You now have a finished multicolored snake!
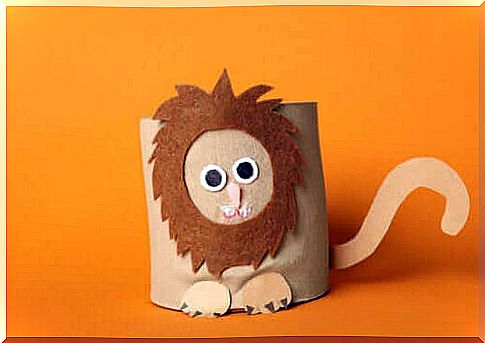
3. Animal crafts: a lion
One of the animal crafts that your kids will love the most!
What do you need:
- Cardboard roll
- Brown and yellow paint
- Highlighter
- A little piece of pink plush
- Brown, orange and yellow colored wool
- Two brown chenille thread / pipe cleaners
- Movable eyes
- silicone glue
Step-by-step:
- First, paint the cardboard roll 2/3 brown (body) and 1/3 yellow (head) and let it dry.
- Then you cut an oval of the plush of about 4 x 2 centimeters and two triangles for the ears.
- In addition, you cut pieces of the wool about 4 centimeters long.
- When the paint is dry, draw the lion’s mouth and nose. Also glue the moving eyes and highlight the eyebrows and whiskers.
- Use a chenille thread as a base for the hair and glue the cut wool. Then give it a round shape and glue it to the main body. Add the ears.
- Then glue some wool on one side to the other chenille thread, that will be the lion’s tail.
- Finally, glue the plush belly and you’re done!
4. EVA Rubber Animal Masks
Materials:
- EVA rubber sheets in different colors
- Colored Rubber Wire
- Highlighters
- Glue
- Scissors
Step-by-step:
This model is adaptable to make different animals: cats, foxes, dogs, bears, raccoons… whatever you want!
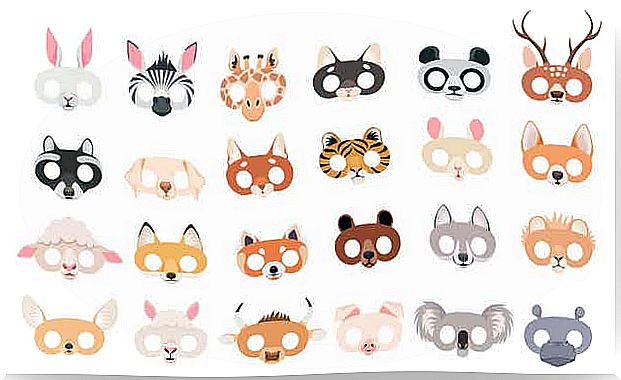
- First, draw the shape of a mask on the EVA rubber; this is the pattern for all models.
- Then cut out the part of the eyes.
- Then make a hole on the base at each end and thread the rubber wire through it.
- Assemble the masks with the colors of your choice, cut and paste the whiskers, ears and noses as well.
- Then glue all parts to the base.
- Finally, add glitter or sparkles if you want to make them more festive!
5. Felt frog dolls
Materials:
- Green, white, black, pink and red felt
- silicone glue
Step-by-step:
- First fold the felt in half so that you have a double shape, put your hand on it and mark the outline with your little finger and thumb open.
- Then cut out the outline with an inch more space at the edges. Then glue this on, except for the part where you have to put your hand in.
- When it’s dry, turn it over. You get the shape of a body with two small arms.
- Then make the eyes, mouth and hands of the frog with the other colored felts.
- Finally, glue all the pieces together.
And now, put your hand through it and you’re ready for a puppet show!
Animal crafts to play and learn
Working with your hands is very good for children, especially if they are doing it with a theme that they love, such as animals for example. This work is fun to do at home or at school and then use the figures as decoration or as toys.
Recycling and awareness of the importance of biodiversity can also be beautiful themes to combine with crafts. So, let’s get started!